Zalo Mini App
Instructions for accessing Zalo mini app for teachers:
- After teachers are granted access (activate account)
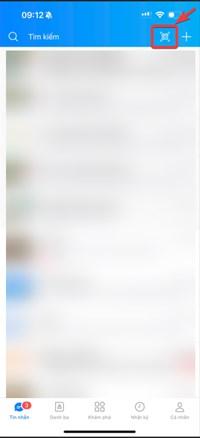
- Access zalo on the phone
- Go to the QR code scanning section, select scan code here Or access the following link: https://mini.zalo.me/apps/3056469859087593239/, turn on code scanning to scan the QR code displayed on the website.
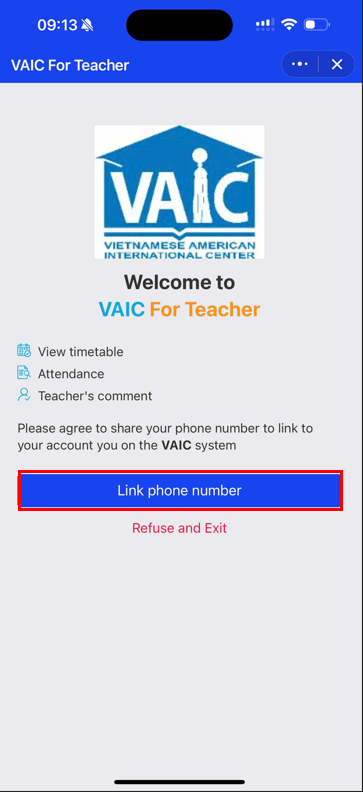
Result: The system displays confirmation of the phone number link to the account on the VAIC system. - Click on "Link phone number"
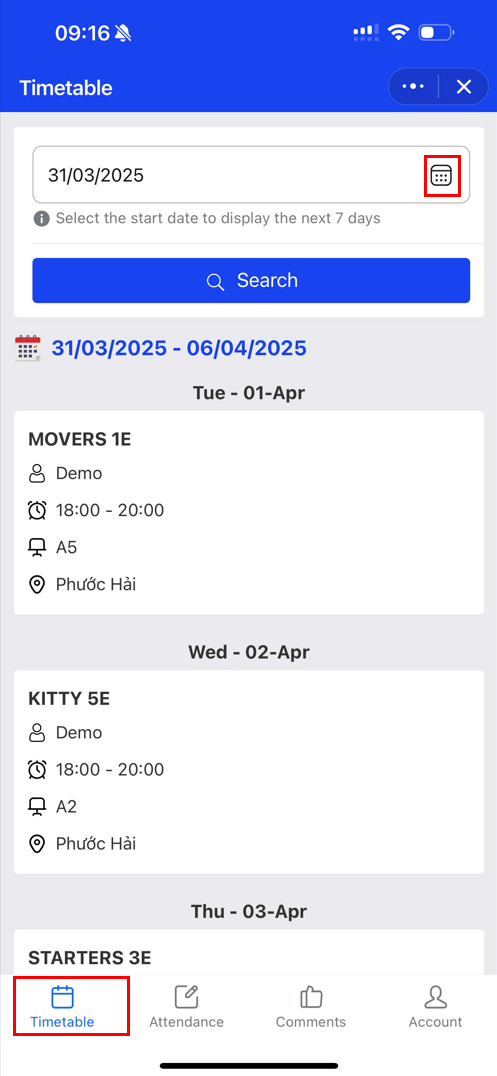
Result: The system successfully accesses the first default tab, which is Timetable

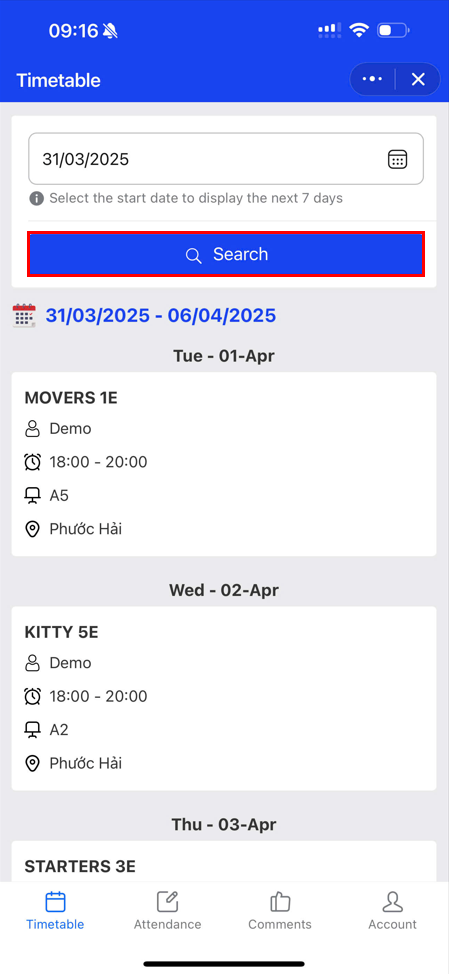
📌View timetable
The teacher's teaching schedule will be shown in the timetable list based on the branch where they work (within 7 days).
1️⃣Within seven days of the chosen date, modify the timetable view.
- To the right of the number of days, click the "Timetable Calendar" bên phải số ngày.
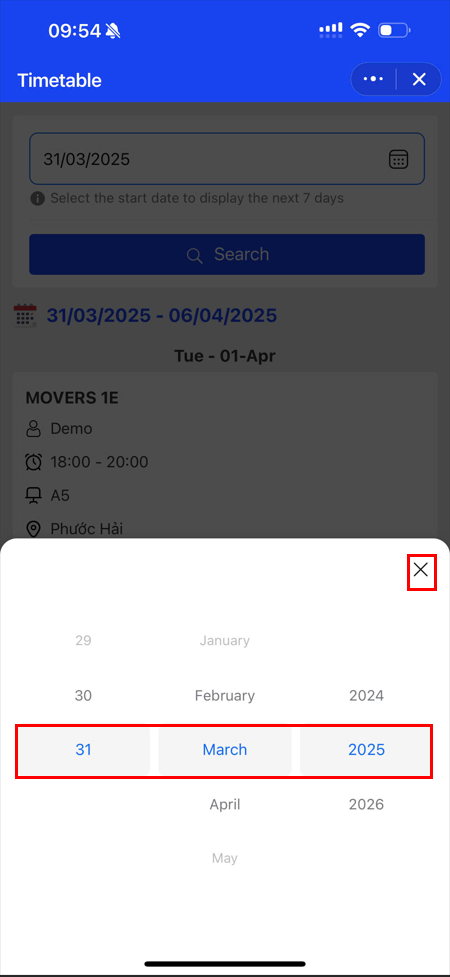
Result: the date selection table appears beneath the screen (To choose a day, month, or year, swipe up or down in each column). - To quit the selection table after choosing the date, click the ❌ icon or another blank area on the screen.
- Click Search to send a request to search for a teaching schedule.
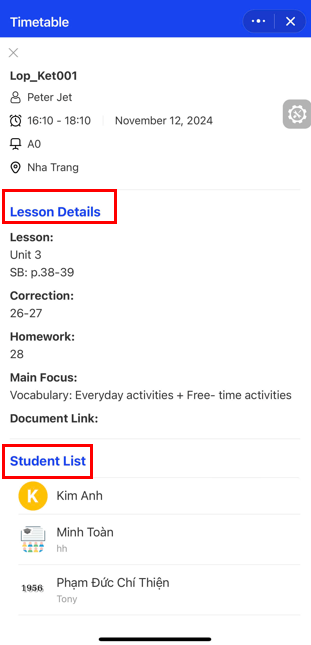
2️⃣View Lesson Details, list of Students in the Class
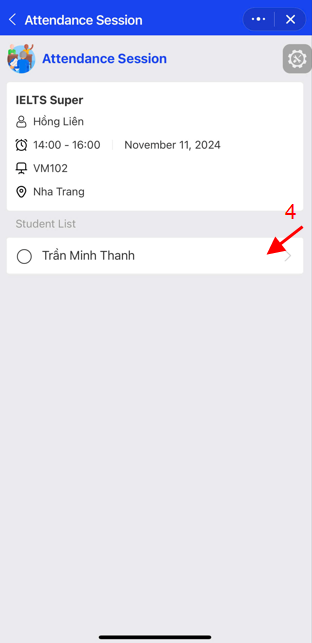
- In the Timetable, find and select the class you want to view
- Click on the class you want to view details
Result: Display a new link page including: Class information, lesson details for that day, list of students in the class.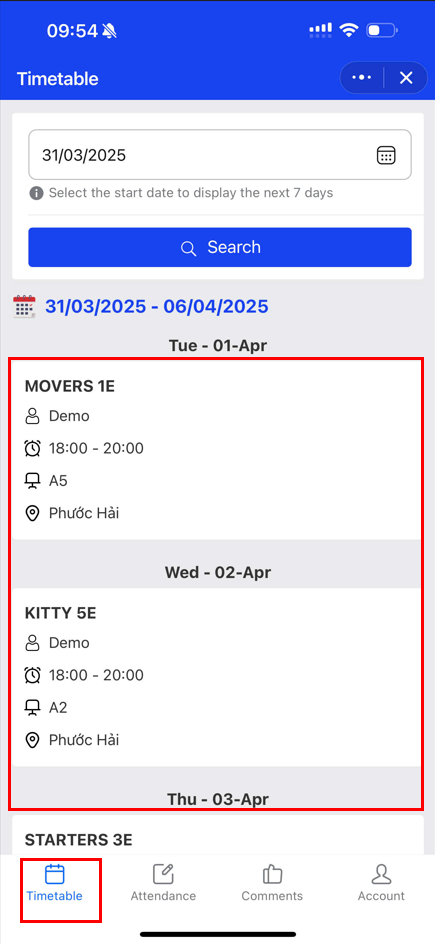

📌Attendance
1️⃣View the Attendance list
Click on the Attendance Tab Attendance below the screen
Result: The system displays a list of classes that need to be attended that day ⚠ Note:
- Attendance can only be taken within the time period set by the center (currently applied: within 6 hours after the class ends).
- After 6 hours, the system will no longer display the class in the list because the attendance window has expired.
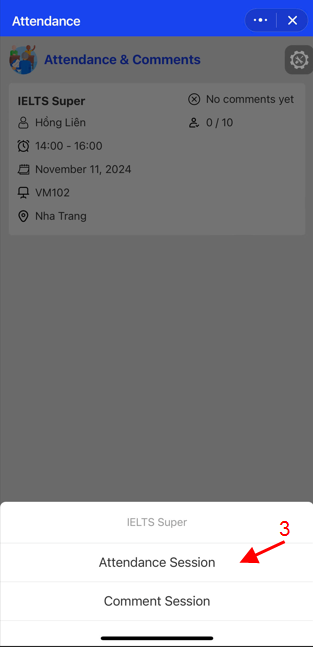
2️⃣Attendance students
- In the list of classes that need to be attended, find and select the class to be attended
Result: The system displays a selection board below the screen. - Select Attendance session to take attendance during the class.
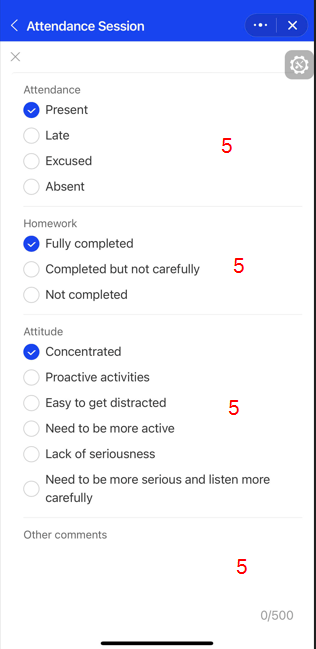
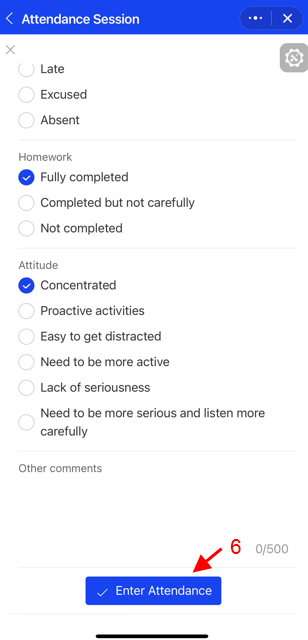
- Tick the student's name, select the attendance items:
4.Check the selected items again, press Enter Attendance to complete Attendance. 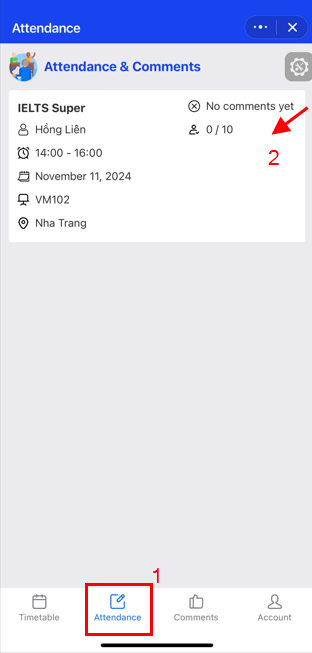
📌Comment on the lesson
After checking attendance, return to step 2 to Comment on the lesson
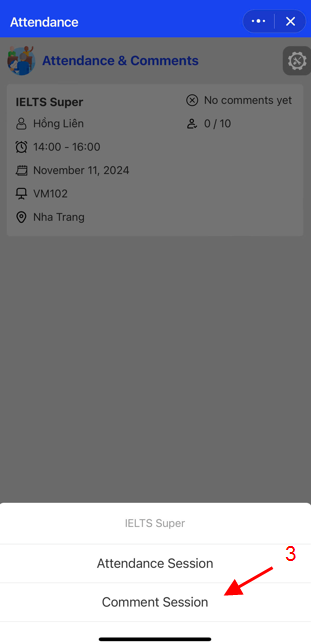
- Select the class to comment on in the attendance list
- Select Comment Sesion
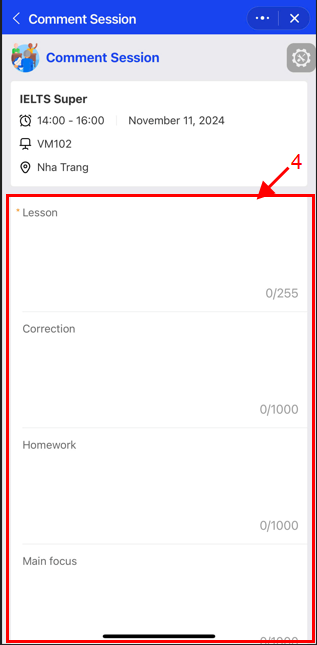
Result: The system displays the items that need to be updated before commenting on the end of the lesson:
- Lesson
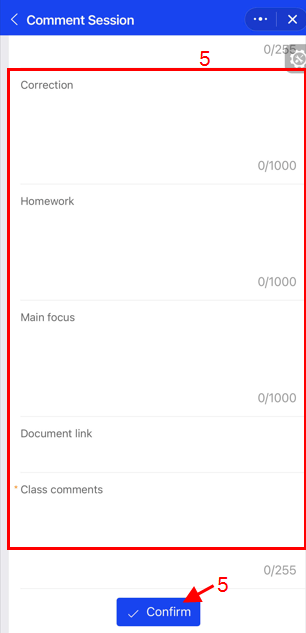
- Correction
- Homework
- Main focus
- Document link
- Class comments
- Click Confirm to confirm the completion of Commenting.
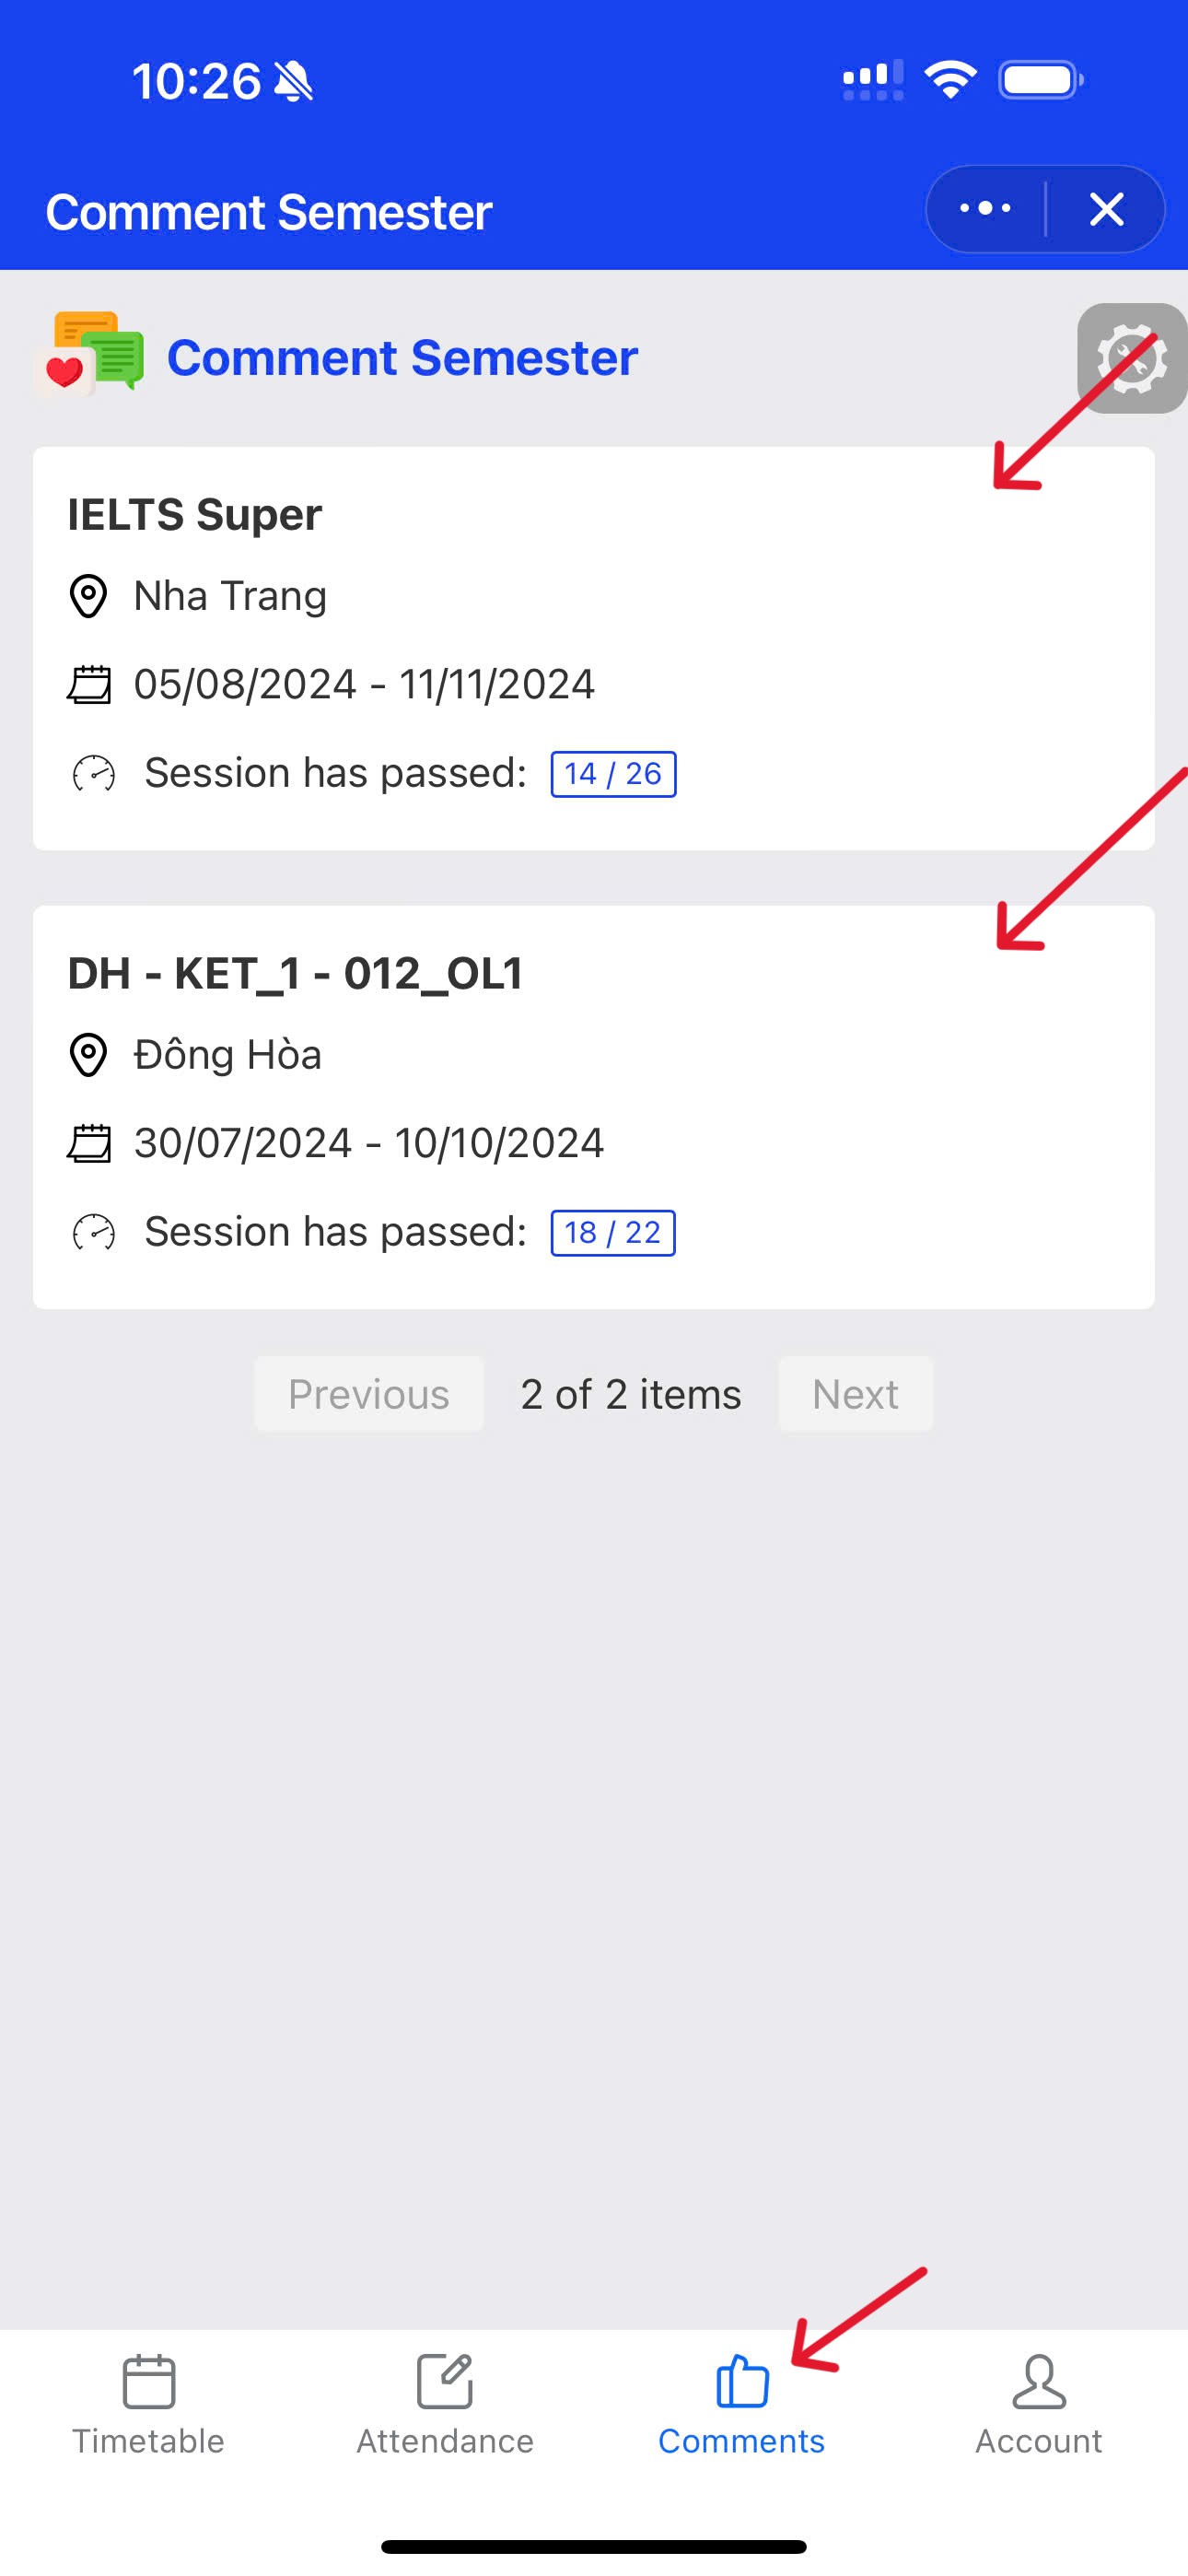
📌Course Comments
- Mid-term comments: When there are 2 sessions left before reaching the midpoint of the course (half of the total number of sessions).
- End of term comments: When there are 2 sessions left before the course ends.
- Select the Comments tab below the screen.
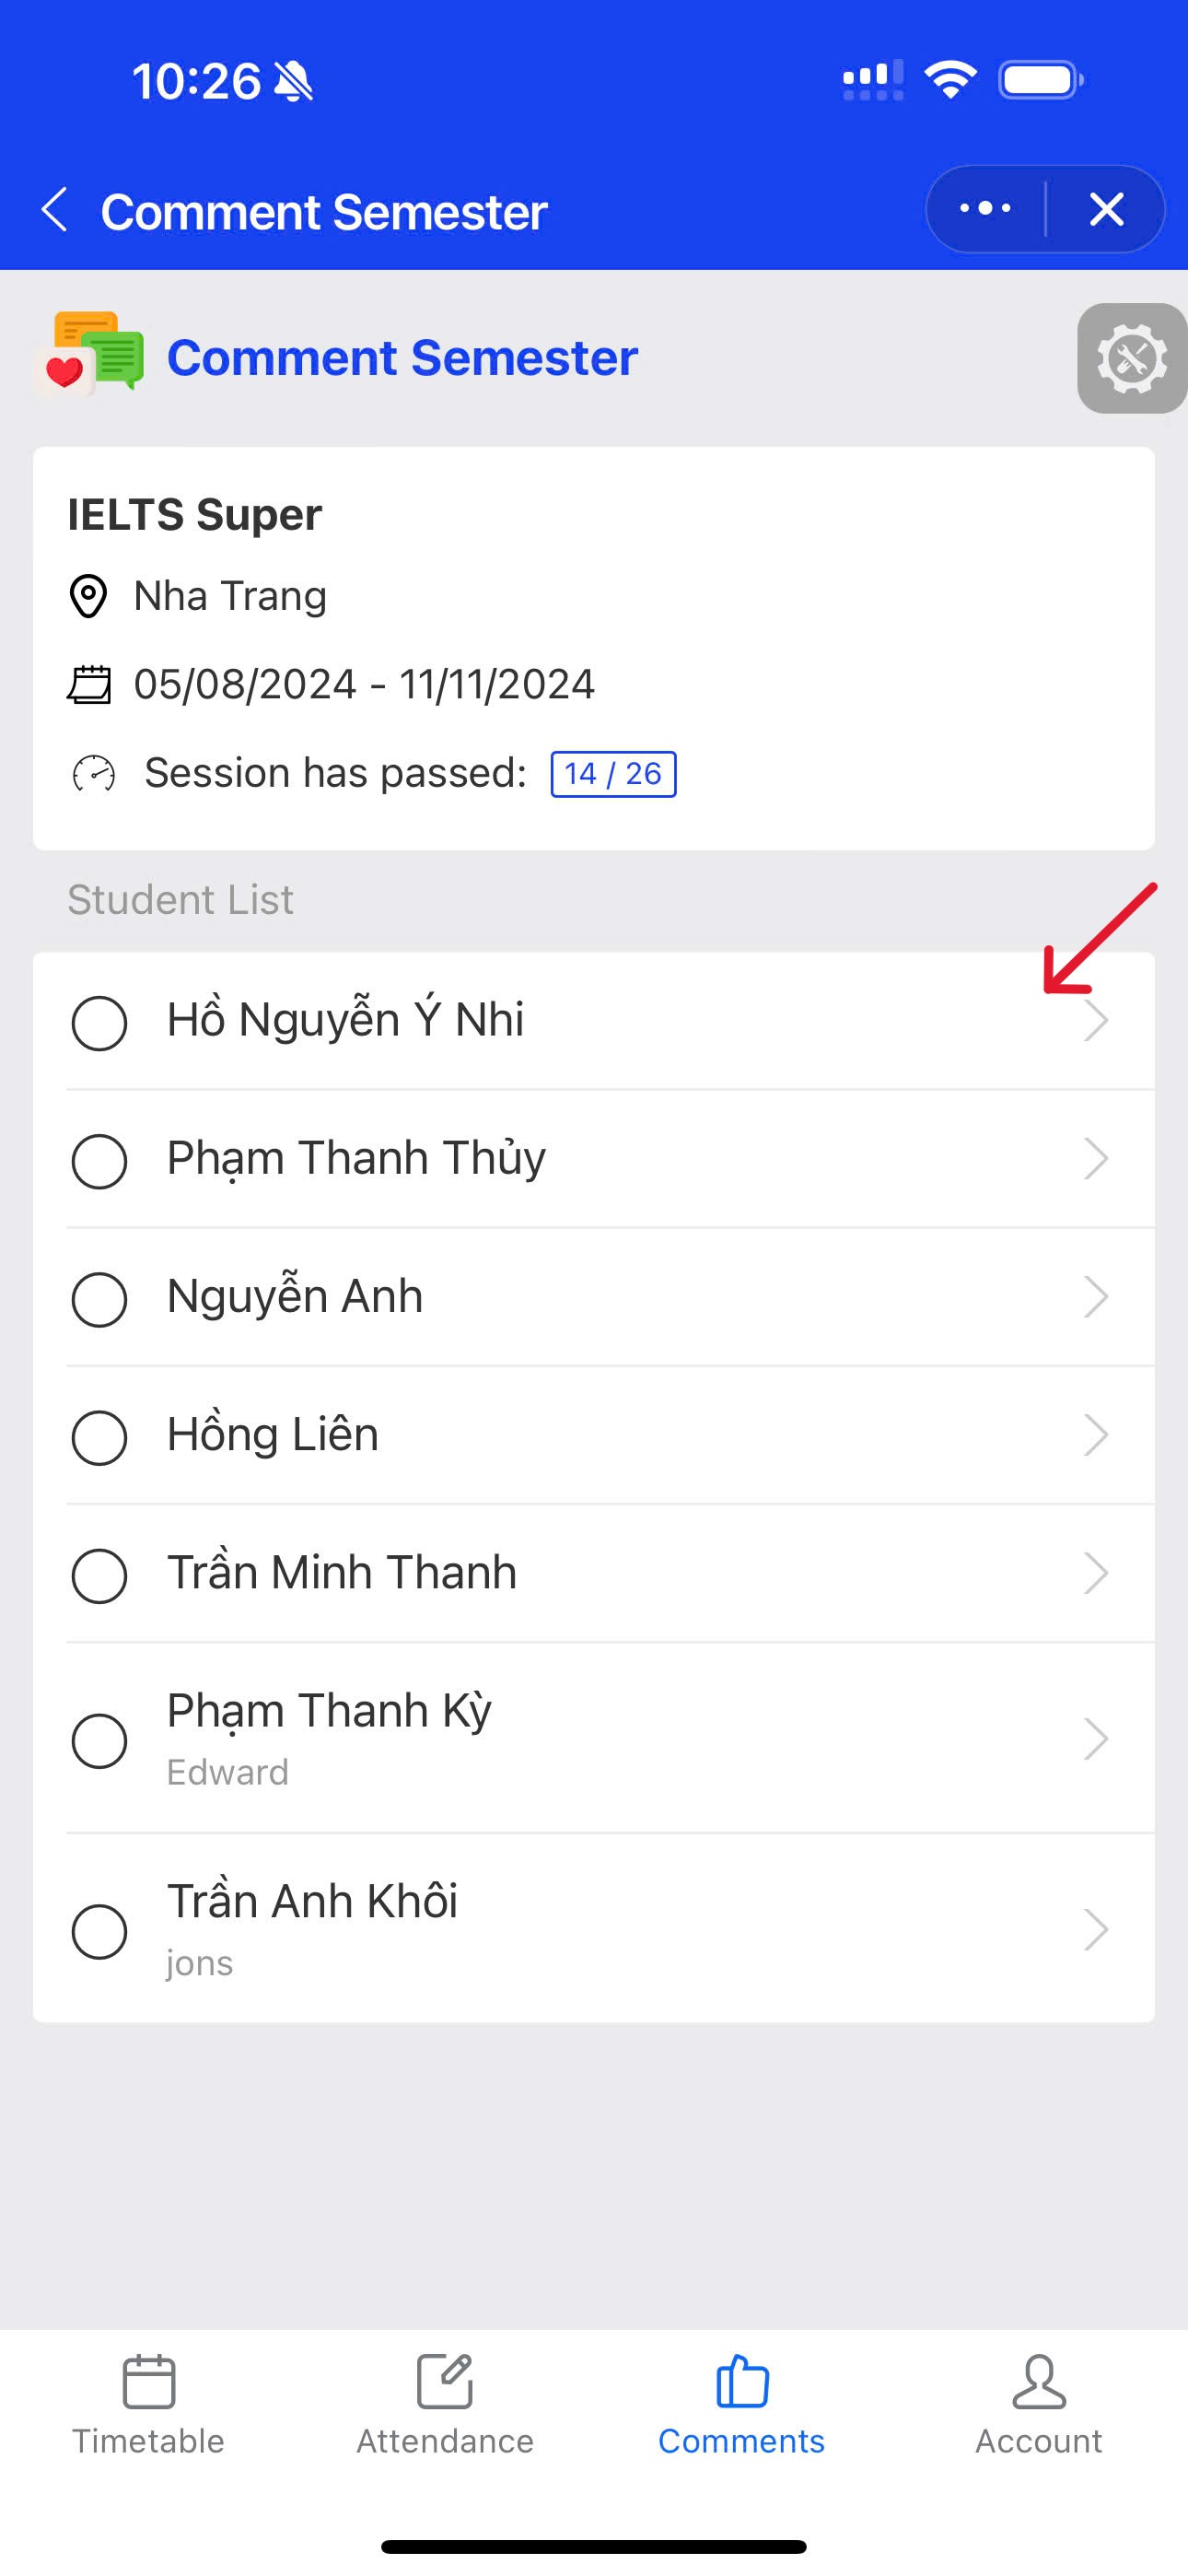
Result: The system displays a list of classes up to the mid-term comment date (From 1/2 of the total number of lessons of the course) and end of term comments (From the last lesson of the course) - Select the class to be commented on
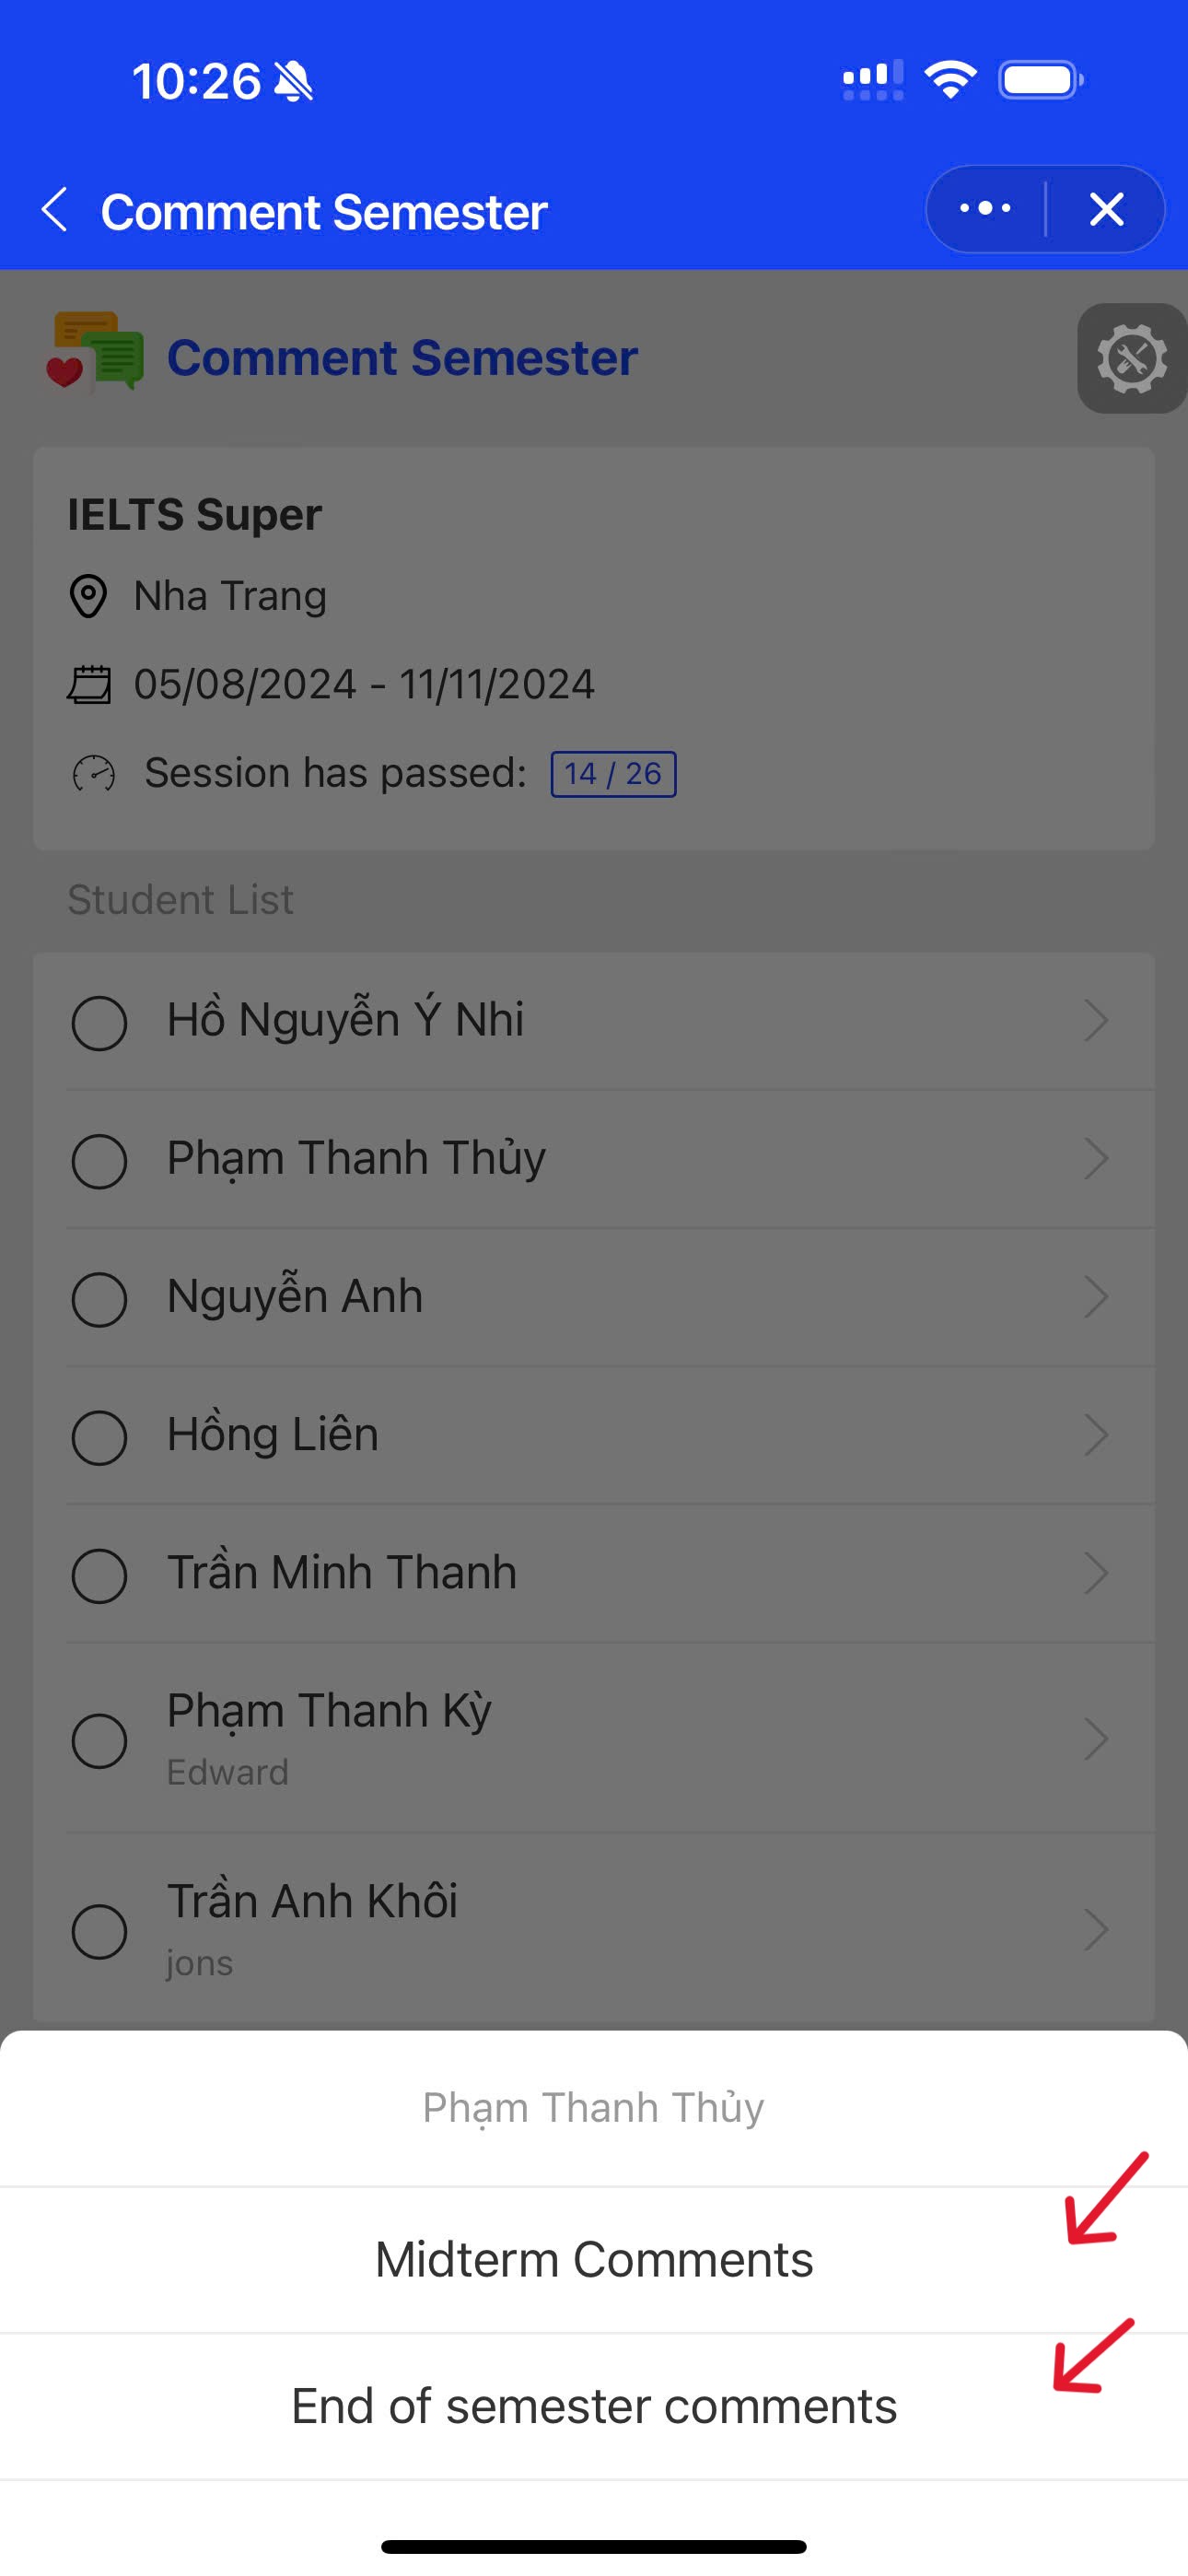
- Select the name of the student to comment on.
- Select:
- Midtern Comments: Mid-term comments.
- End of semester comments: End of semester comments.
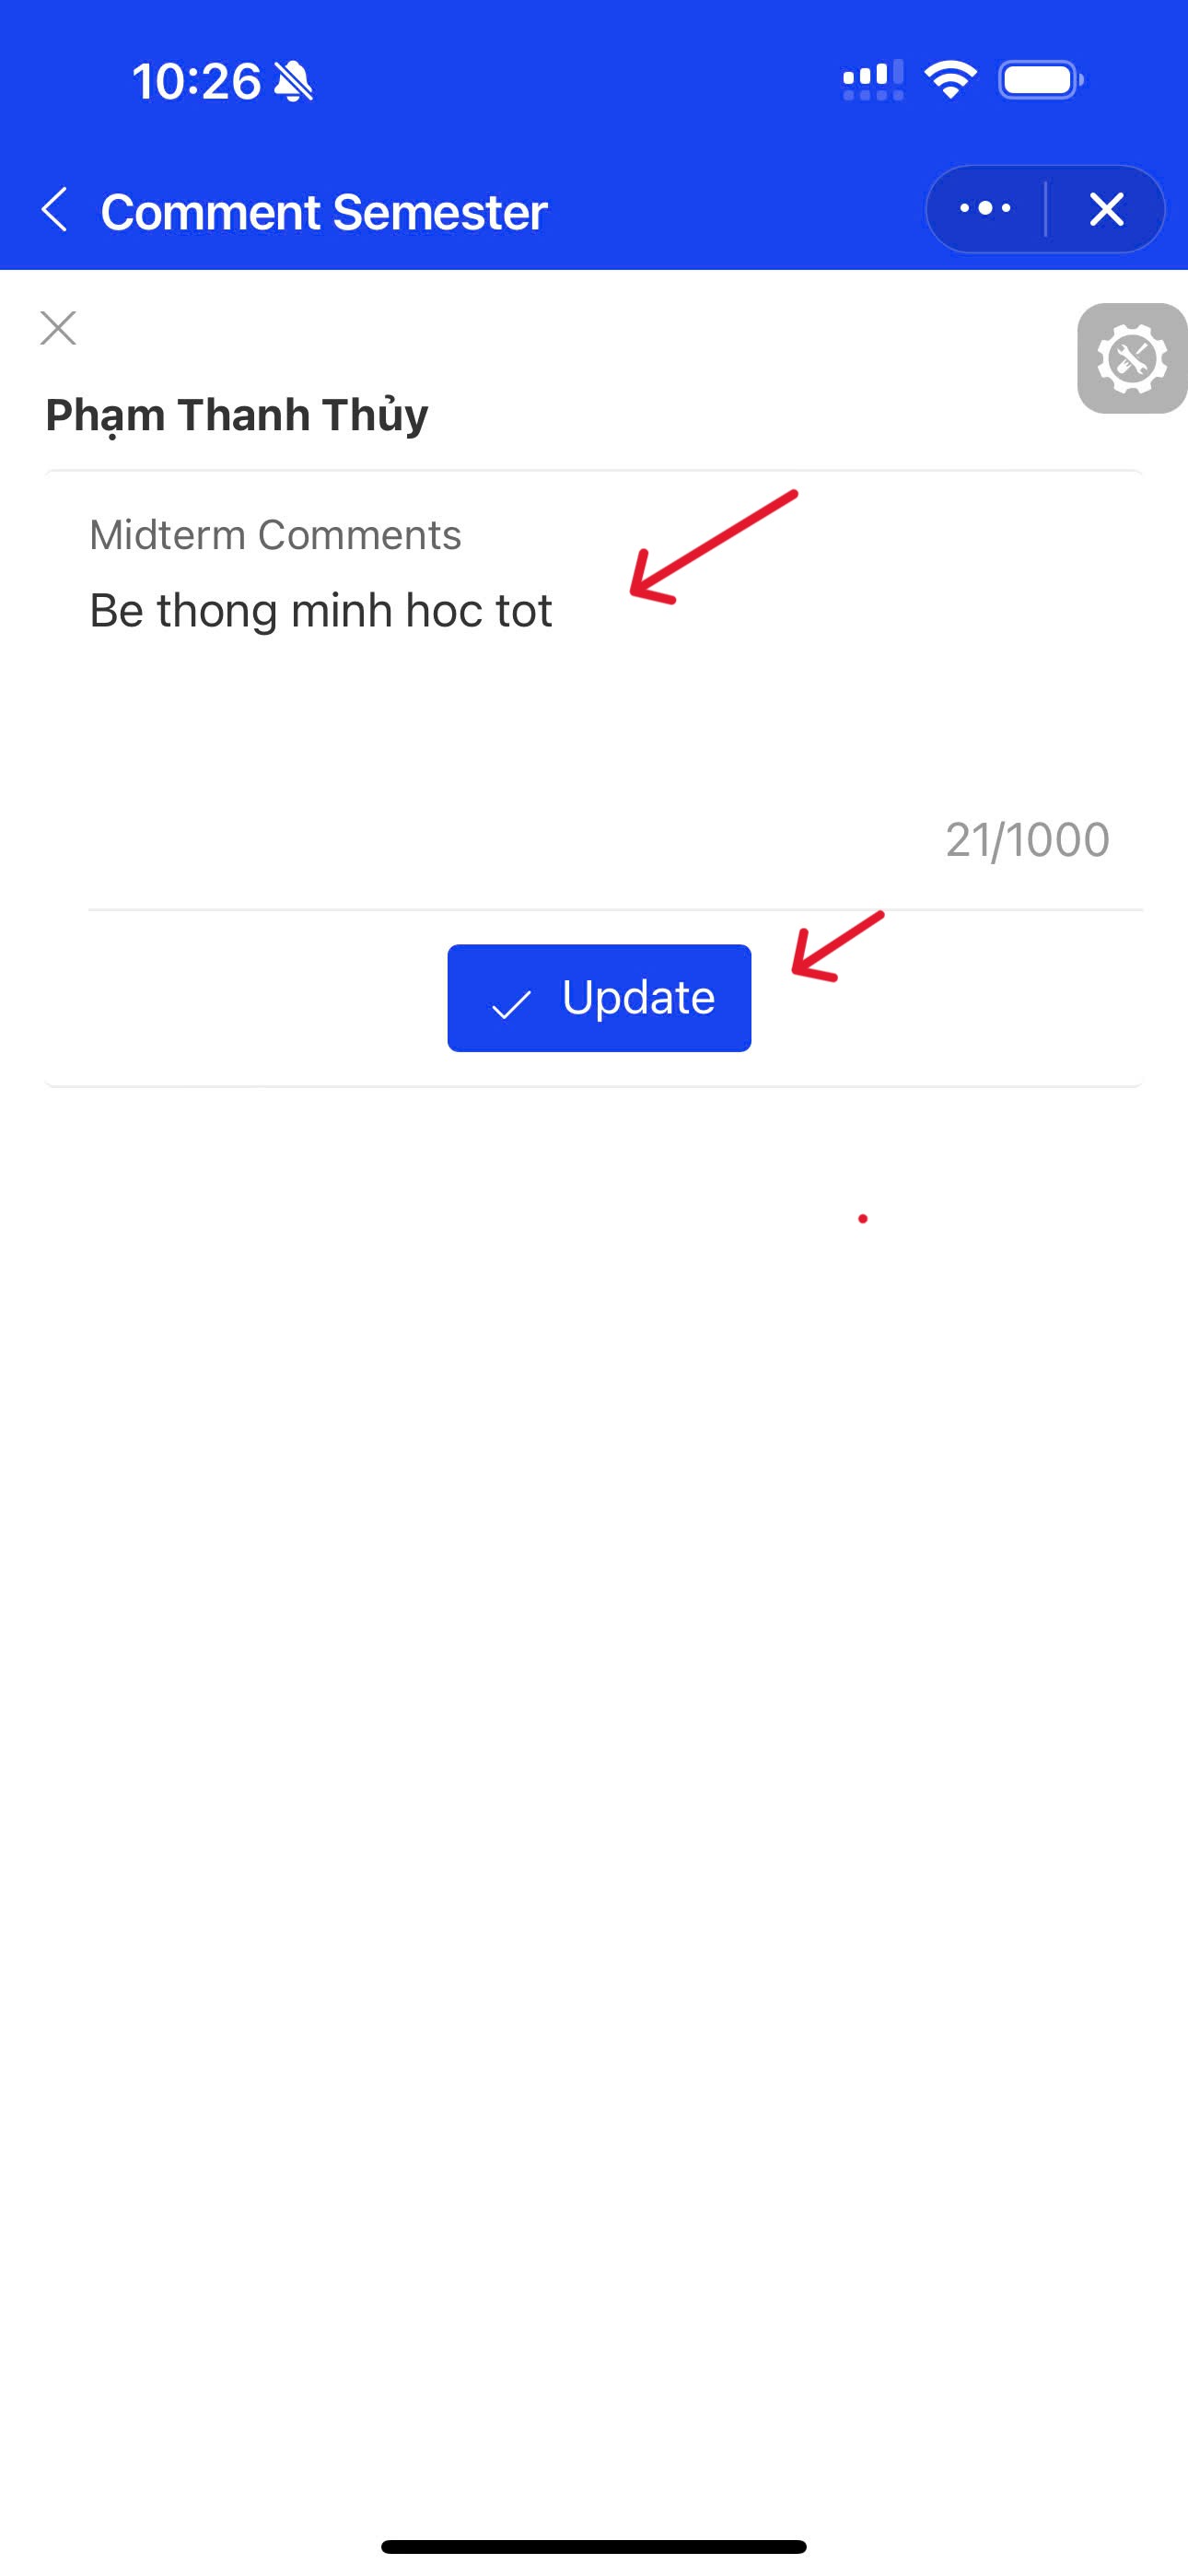
- Enter the comment, click Update to save the comment